The ROX Guidebook
Part II
Welcome back to the tutorial! In this part, we'll look at using some of the standard ROX applications.
Edit
Click on 'Apps' on the panel and click on the 'Edit' application, if you see it. If Edit isn't installed yet, you'll need to fetch it from the ROX website. You may also need to install ROX-Lib, a 'library' of shared code used by several other programs, including Edit. Edit will warn you if ROX-Lib isn't installed.

You can now enter some text to experiment with. Clicking on the lifebelt icon (at the right end of the toolbar) will show you Edit's help files. You can also see these by bringing up the menu over Edit in the filer window and choosing Help, as before.
Clicking Menu (the right mouse button) over the text will open Edit's main menu. You can choose Options from here to change the current font or colours used to display files.
Saving from Edit
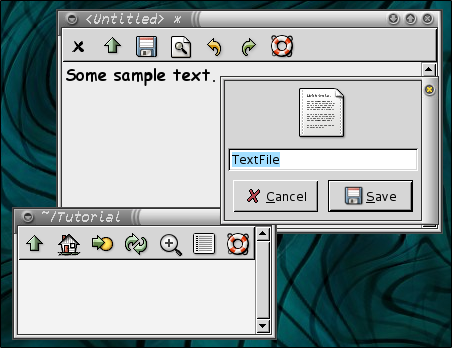
To save your sample file, click on the disk icon in the toolbar, or choose Save from the menu. A save box will appear, which looks rather like the 'New Directory' box seen earlier. Choose a name for your new file and drag the icon to a filer window (just as if you were copying a file from a directory).
In this case, we'll save to the Tutorial directory created in Part I. Press the shortcut you set then (eg, Control+F1) or click on the Tutorial directory to open it. Drag the picture of the text file into the directory. You could also have dragged directly to the Tutorial directory on the panel.
Loading files
If you now close the Edit window, you can reload the saved file by dragging it back from the Tutorial directory onto Edit's icon. To make this easier, drag Edit from your Apps directory onto the panel.
If you'll often want to load text files into Edit, you can make Edit the default run action. Bring up the menu over the saved text file and choose 'Set Run Action' from the File submenu. Then, drag Edit (eg, from the panel) onto the marked area:
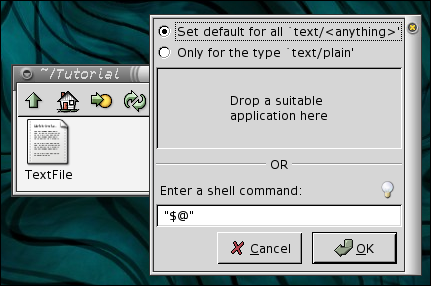
Clicking on any text file will now open it in Edit.
Archive
To save space, and to make transporting files easier, we can compress files into an archive, using the Archive application. Archive can later be used to extract the files from the archive. For example, drag the text file you just saved onto Archive:

Drag the compressed file from Archive's save box back into the filer window (or anywhere else you please, of course). In fact, if you just want to save the archive to the same directory that the file came from, you can just click on the Save button.
Installing software with Archive
Software you find on the net will usually be compressed. You can use Archive to extract it as described above. For example, download some more ROX applications, for example:
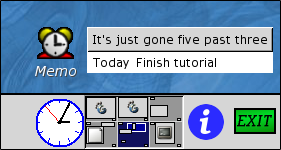
- Memo (a desktop alarm clock and TODO list)
Drag the memo-<version>.tgz archive onto Archive to extract it. Save the extracted directory into Tutorial. Inside the directory you will find the Memo application, which you can click on to run it. You can move the Memo application anywhere you want using the filer (drag with Shift held down to move things).
The desktop background
Maybe you're getting bored with that plain grey background now? There are several things you can do with the desktop background.
First, you can use it just like a panel; drag things onto the background (called the 'pinboard') to create shortcuts to them.
Second, you can choose an image for the background. Click Menu (right button) over the pinboard and choose 'Backdrop...' from the menu. Drag an image file from a filer window into the box that appears to set the image (just as you dragged an application into the Run Action box to set the action).
If you want more control over the backdrop (for example, you'd like to have a random image chosen each time you log in, or you want an animated image of the Earth there) you can install the Wallpaper application (just as you installed Memo).
Panel applets
There's one final trick to the panel. If you drag a special type of application, called a panel applet, onto the panel then the program will run directly inside the panel, instead of just being a shortcut.
You can find some applets here: